
Return and warranty claim form for online stores
What you can set up in the RetJet return and warranty claim form: fields, requirements, languages, look and the ways to give it to your customers.

A customer wants to report a return or a warranty claim. They enter the order number, choose the products, describe the problem and attach a photo. On your side, the team gets a ready request with a number and a status, with no retyping from an email or a paper slip.
The RetJet form is that first step. Below you’ll find what you can set in it and how many ways there are to put it in front of your customers.
Returns, warranty claims, or both
You choose what the customer can report: returns and warranty claims in one form, returns only, or warranty claims only.
For each type you set separate requirements:
- a comment in the customer’s own words,
- a photo upload field,
- a photo that is either required or optional.
A typical setup is a required photo for warranty claims, as proof of damage, and an optional one for returns. How the system handles both in the dashboard is described on the pages about the returns management system and the warranty claims management system.
Questions the form asks the customer
A few switches make the form collect up front what you would otherwise chase by email:
- the resolution the customer wants: a refund, an exchange or a repair. You build the list yourself and mark whether each option applies to returns, warranty claims or both,
- product condition: new, used, damaged, from a list you edit,
- bank account number: a field that is visible and, if you wish, required, so you don’t have to ask for the account number later,
- return policy and GDPR: you provide the links and the form shows an acceptance field.
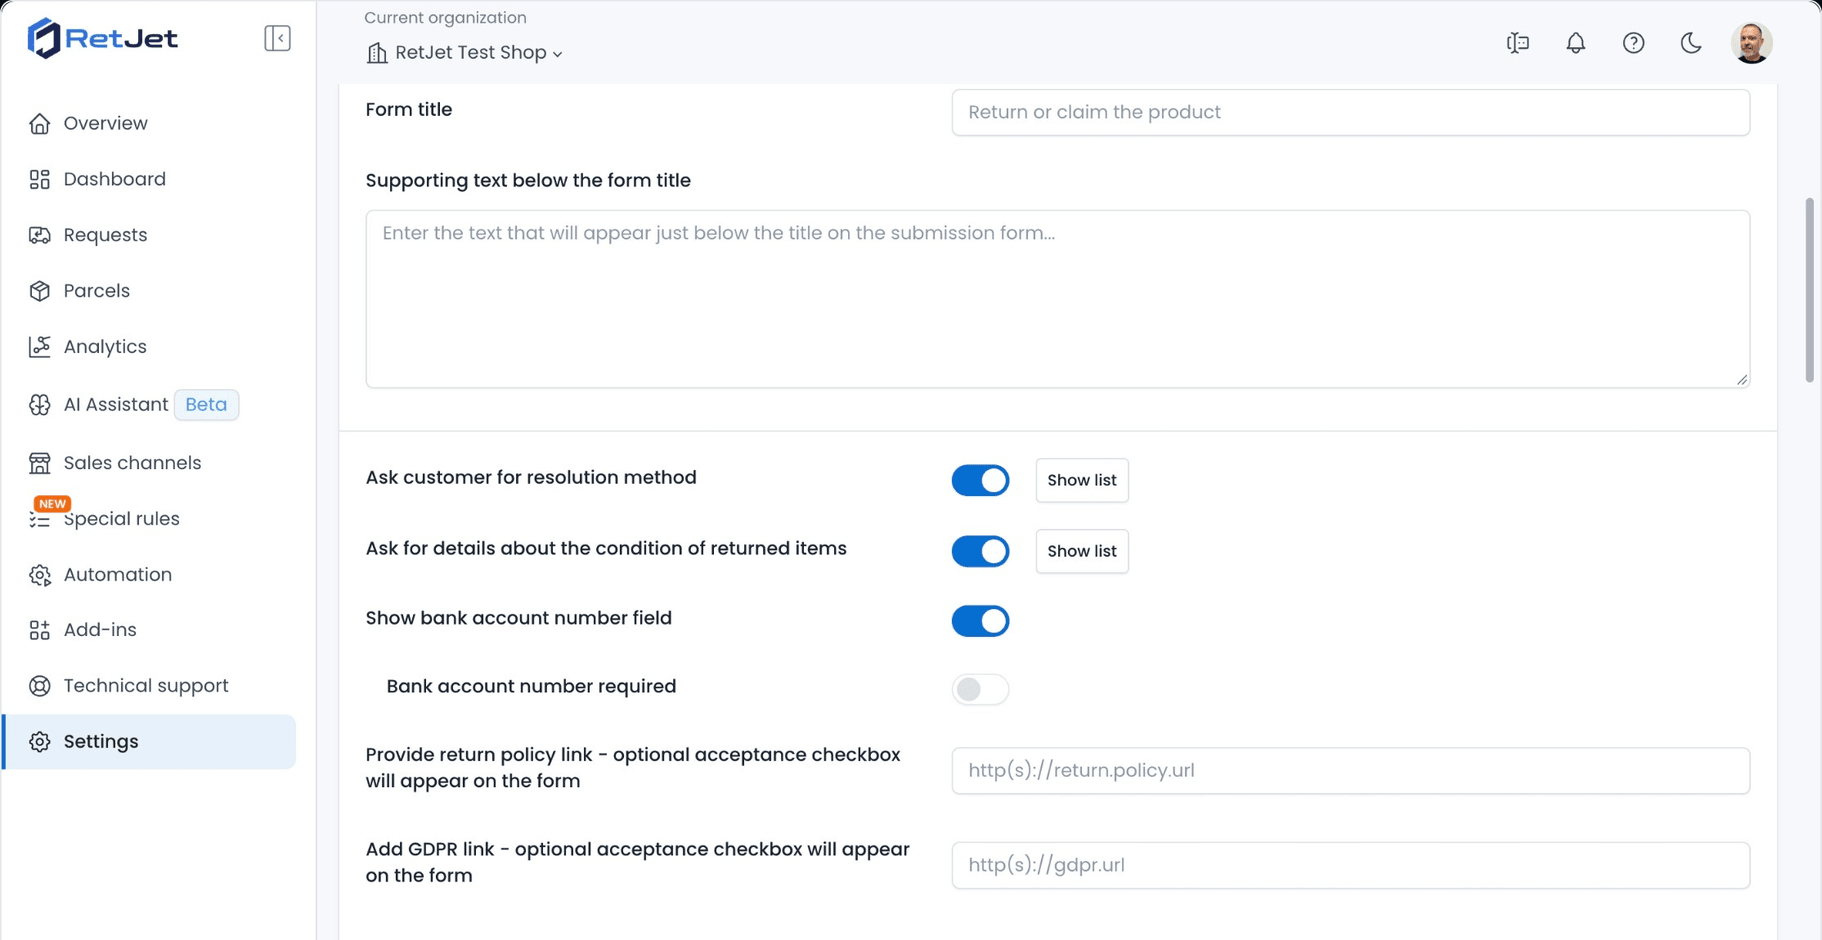
Every element is optional. A store that accepts only returns and refunds by bank transfer will set the form up differently from an electronics store that takes warranty claims.
Language, wording and look
The form should look like part of your store.
- Wording: for each language you set the title, a short helper text and the confirmation message the customer sees after submitting. The confirmation message comes with ready templates and a preview.
- Look: your logo, the colour of the main button and a background image, for example a store banner or a sale graphic.
- Custom CSS: if that’s not enough. The panel accepts style rules only and rejects pasted HTML.
Five ways to offer the form
- A standalone page under its own link. You put the address in your menu, footer or terms. Nothing to install.
- Embedded on your own site. A short code snippet on a “Returns and warranty claims” page. You can choose whether the form opens on the return tab or the warranty claim tab.
- A link in the customer’s email. In the order or shipping email you add a link with the
{email}and{orderId}variables. The customer clicks it and lands in the form with the order details already filled in. - A pop-up window. Two cards on the page, “Return” and “Warranty claim”. Clicking one opens the form in a pop-up. You set the card descriptions, language and window width, and see a live preview next to it.
- Google Tag Manager. For stores where the page code isn’t edited directly.
The standalone page is enough to get started. If you don’t have your own store or don’t want to connect an API, see the basic integration.
Store rules built into the form
- Deadlines: for each sales channel you set the number of days for a return and for a warranty claim, counted from the order date. A customer can’t submit a request after the deadline.
- Return address: you say where the item should be sent. You can have several addresses, for example a warehouse and a showroom.
- Rules for selected products: you match products by EAN or SKU codes and set the rules for each group: block a return, extend the deadline, point to a different address or ask the customer a question, for example “Was the packaging opened?”. The rules don’t work for the Allegro channel or for the standalone form.
What happens after the customer submits
The system creates a request with a unique number and an initial status. You can link statuses to message templates, so a status change sends the customer an email automatically. You can send yourself a test message before saving.
The customer knows what stage their case is at, and your team doesn’t answer the same question by hand.
Frequently asked questions
Do I need to put the form on my own website?
No. You can use only the standalone form page and link to it from your store or in an email.
Can the form work in several languages?
Yes. You set the title, helper text and confirmation separately for each language.
Can I accept returns only?
Yes. In the settings you choose returns and warranty claims, returns only or warranty claims only.
How long does the setup take?
It depends on the integration route you choose. We describe the two options in the quick start guide.